Cloud Knowledge

Your Go-To Hub for Cloud Solutions & Insights

Advertisement

How to Integrate Azure Active Directory with Okta Using SAML

How to Integrate Azure Active Directory with Okta Using SAML

Integrating Azure Active Directory (Azure AD) with Okta using SAML 2.0 provides a flexible and secure way to manage federated identity across organizations. While Okta typically functions as an Identity Provider (IdP), it can also act as a Service Provider (SP), accepting authentication from external IdPs like Azure AD. This is especially valuable when external users—such as partners or subsidiaries—need access to applications managed within Okta.

In this guide, we’ll walk through the complete setup process to configure Azure AD as an IdP for Okta using SAML, enabling seamless Single Sign-On (SSO) across both platforms.

Use Case Overview

Imagine your organization uses Okta to manage application access. A partner organization needs to collaborate using one of your applications. Instead of creating and managing separate credentials for your partner, you can allow them to authenticate using their existing Azure AD credentials. Okta delegates the authentication to Azure AD and handles the user provisioning and authorization process using SAML assertions or OIDC tokens.

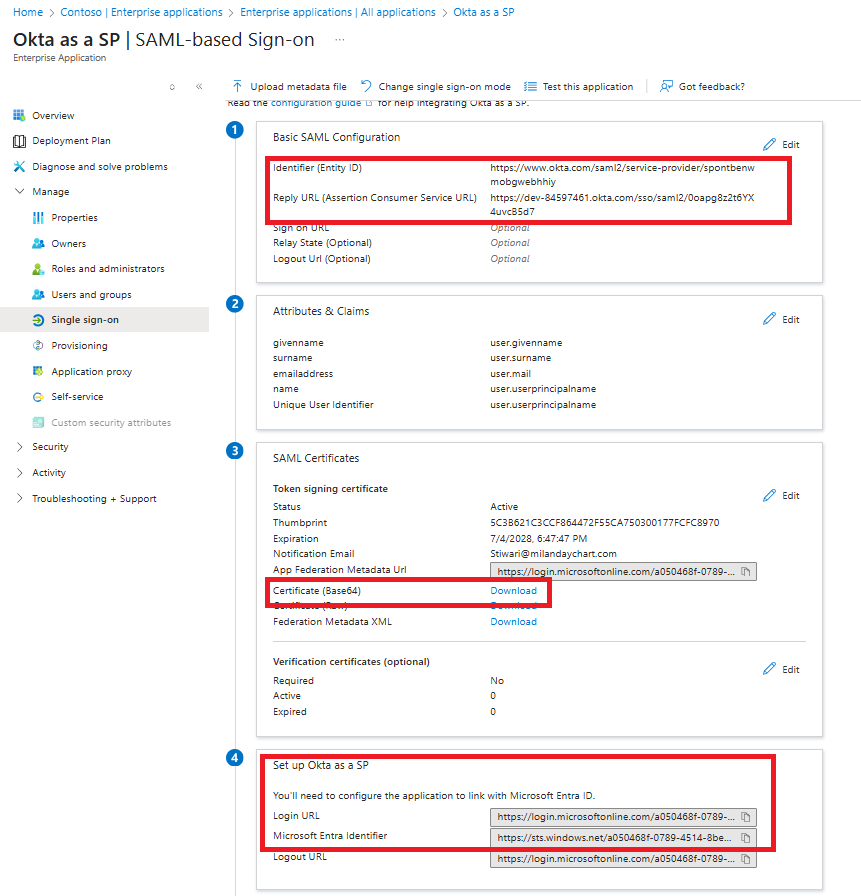
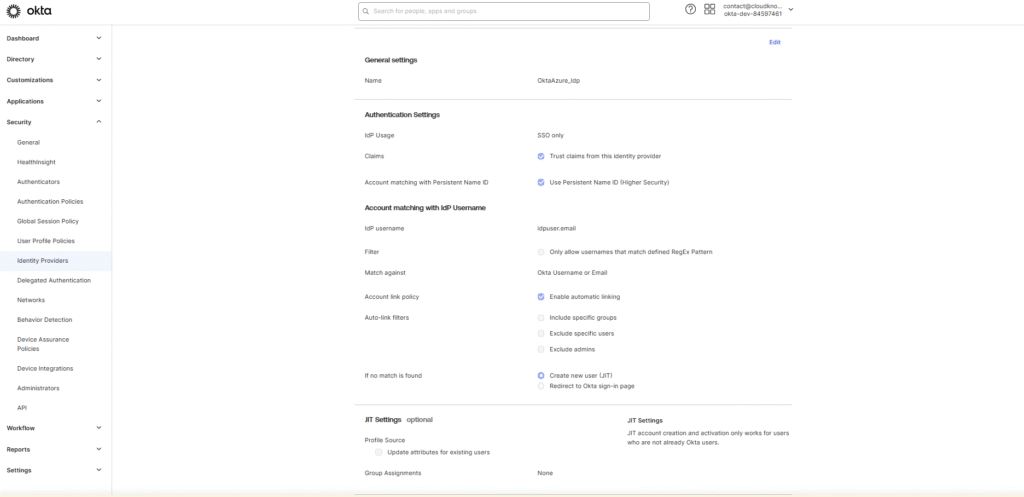
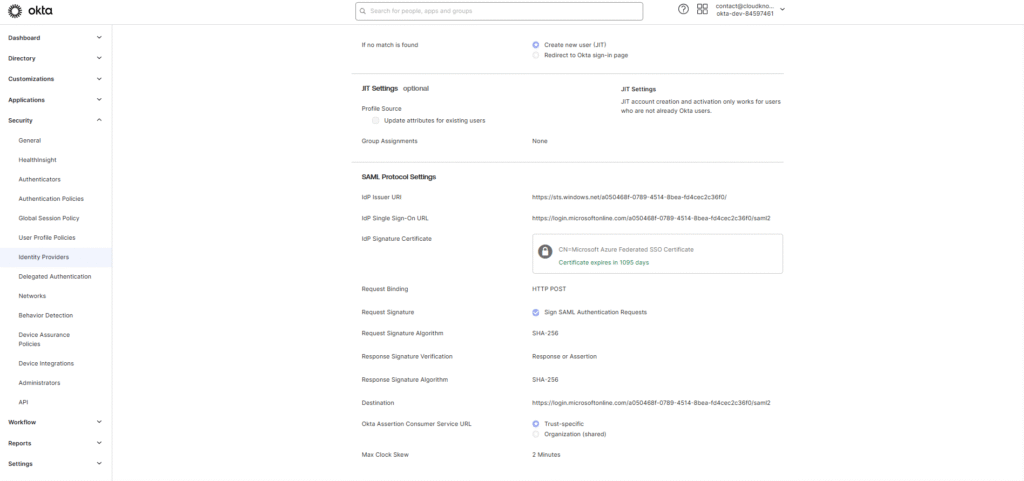
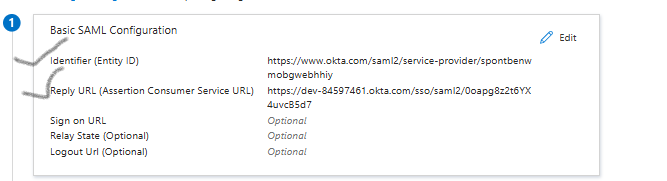
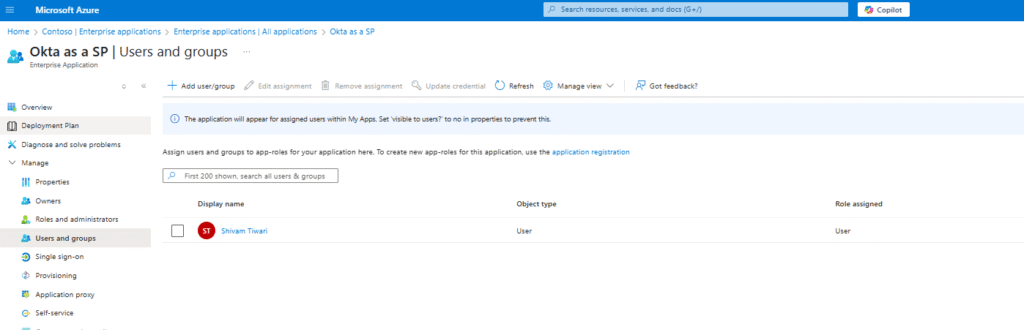
Step 1: Create the Okta Enterprise App in Azure Active Directory

Setup Process

  1. Sign in to the Azure Portal.

  2. Navigate to Azure Active Directory > Enterprise applications.

  3. Click New Application > Create your own application.

  4. Name your app (e.g., “Okta”) and select Non-gallery application.

  5. After creation, go to Single sign-on > SAML.

  6. Enter temporary values for:

    • Identifier (Entity ID)

    • Reply URL (Assertion Consumer Service URL)

    These will be updated later once the integration is complete.
  7. Download the Base64 certificate under SAML Signing Certificate.

  8. Record the values for:

    • Login URL

    • Azure AD Identifier

Create the Okta Enterprise App in Azure Active Directory

Step 2: Configure Azure AD as an Identity Provider in Okta

Now that the Azure app is created, it’s time to configure Okta to accept authentication from Azure AD.

Steps in Okta Admin Console

  1. Navigate to Security > Identity Providers.

  2. Click Add Identity Provider > Add SAML 2.0 IdP.

  3. Fill in the following:

    • Name: e.g., “AAD”

    • IdP Username: idpuser.email

    • Match against: Okta Username

    • Account Link Policy: Choose between Automatic or Disabled

    • Auto-link Restrictions (optional): Restrict to specific groups

    • Create new user (JIT) (optional): Enable for Just-In-Time provisioning

  4. JIT Settings (if enabled):

    • Update attributes for existing users

    • Optionally reactivate or unsuspend users

    • Assign group behaviors as needed

  5. SAML Protocol Settings:

    • IdP Issuer URI: Azure AD Identifier

    • IdP SSO URL: Azure AD Login URL

    • IdP Certificate: Upload previously downloaded Base64 cert

  6. Click Add Identity Provider and record the:

    • Assertion Consumer Service URL

    • Audience URI

Configure Azure AD as an Identity Provider in Okta 1
Configure Azure AD as an Identity Provider in Okta 2

Step 3: Update the Okta Enterprise App in Azure AD

Now that you have the correct SAML values from Okta:

  1. Go back to Azure Portal > Enterprise Applications > Okta > Single sign-on > SAML.

  2. Click Edit under Basic SAML Configuration.

  3. Update:

    • Identifier (Entity ID): Use Audience URI from Okta

    • Reply URL: Use Assertion Consumer Service URL from Okta

  4. Click Save and Close.

Update the Okta Enterprise App in Azure AD

Step 4: Map Azure AD Attributes to Okta Attributes

To ensure smooth user provisioning and authentication, map Azure AD user claims to Okta attributes.

Steps to Map Claims:

  1. In Okta Admin Console, go to Directory > Profile Editor.

  2. Search for your Azure AD IdP name.

  3. Click Profile > Mappings.

  4. Under AAD App to Okta User, set all attributes to “Do not map” except login.

  5. Delete default non-editable attributes like First Name, Last Name, Email.

  6. Add custom attributes for:

    • Emailemail → Claim: http://schemas.xmlsoap.org/ws/2005/05/identity/claims/emailaddress

    • First NamefirstName → Claim: .../claims/givenname

    • Last NamelastName → Claim: .../claims/surname

    • UPN (Optional) → upn → Claim: .../claims/nameidentifier

  7. Click Mappings > Configure User Mappings and link these attributes:

    Azure AD Attribute Okta Attribute
    email or upn login
    email or upn email
    givenname firstName
    surname lastName
    nameidentifier (optional) upn
  8. Click Save Mappings > Apply Updates Now.

Map Azure AD Attributes to Okta Attributes

Step 5: Test Azure AD and Okta SAML Integration

  1. Go to Azure Portal > Enterprise Applications > Okta > Users and Groups.

  2. Click Add user > Select user > Click Assign.

  3. Navigate to Single Sign-On > Scroll to Test Single Sign-On section.

  4. Click Test > Sign in with your Azure AD credentials.

  5. The Okta End-User Dashboard should appear

Test Azure AD and Okta SAML Integration
Add Users in Application
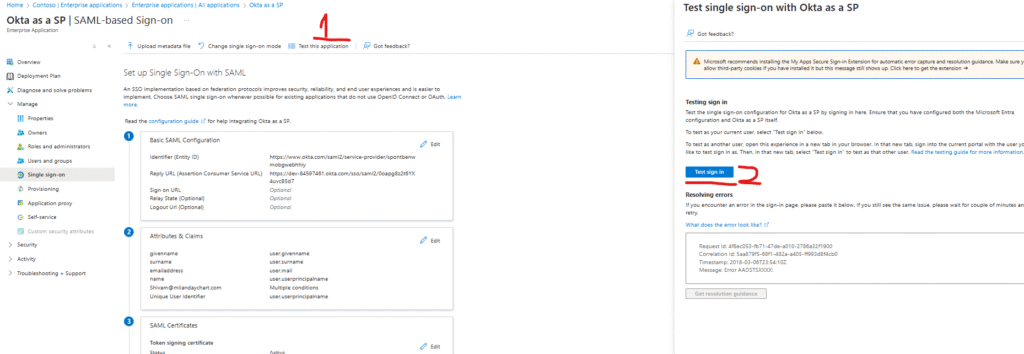
Test the Saml SSO between Entra as IDP and OKTA as SP
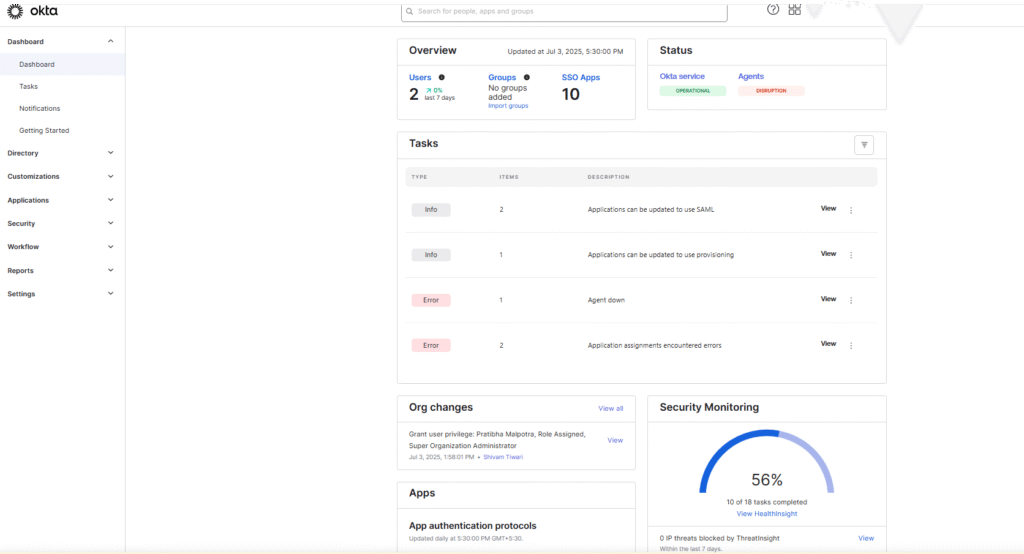
okta login page after SMAL (Attribute and claim satisfyed)

Final Thoughts

Integrating Azure Active Directory with Okta using SAML 2.0 streamlines identity management across organizations and partners. By enabling inbound federation, you allow trusted external users to authenticate using their native identity providers while still benefiting from Okta’s rich access controls and provisioning capabilities.

This integration is ideal for reducing administrative overhead, improving security, and delivering a smooth user experience for both internal and external users.

Leave a Reply

Your email address will not be published. Required fields are marked *